Tri-Clamp Keggle
When I made my first keggle, I used weldless bulkheads for all my connections as it was relatively easy to do, and worked just fine.
What I really wanted though, was welded Tri-Clamp (also known as Tri-Clover) fittings, as these are easier to clean, less likely to harbor bacteria and other nasties, and allow for changeable configurations. Problem is, I can’t weld, stainless steel welding requires special equipment and knowledge to do it right, and can be costly.
Then I stumbled upon a Homebrewtalk.com Forum Thread that showed how to solder stainless steel. Now this is a little more my speed, so I jumped in.
I procured a decommissioned 1/2 keg, cut out the top, and proceded to drill a hole in the new keggle. I then used a 13/16″ Greenlee Punch to make the hole for the 1″ Tri-Clamp ferrule.
Now I had to create a “dimple” in the hole going from the inside of the keggle outward that is the same diameter as the ferrule, so I got the parts necessary to make a home-made swaging tool from McMaster-Carr:
| Part # | Description |
| 45605K711 | Std-wall 304/304l Ss Butt-weld Pipe Fitting, Unthreaded, 3/4 X 1/2 Pipe Size, Reducing Coupling |
| 4335T64 | Low-pressure Sckt-weld 304 Ss Unthrd Fitting, 1 Pipe Size, Coupling |
| 92620A810 | Grade 8 Alloy Steel Hex Head Cap Screw, Zinc Yellow Pltd, 5/8″-11 Thrd, 4-1/2″l,fully Thrd |
| 90107A035 | Type 316 Ss General Purpose Flat Washer, 5/8″ Screw Size, 1-1/2″ Od, .06″-.09″ Thick |
| 90107A033 | Type 316 Ss General Purpose Flat Washer, 1/2″ Screw Size, 1-1/4″ Od, .05″-.08″ Thick |
| 93827A253 | Ultra-coated Grade 8 Steel Hex Nut, 5/8″-11 Thread, 15/16″ Width, 35/64″ Height |
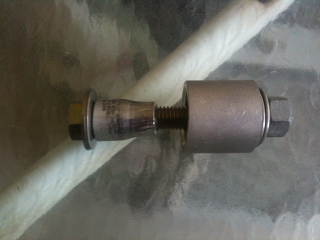
When I got the parts, I discovered that the reducing coupling’s inner diameter was slightly smaller than the 5/8″ bolt, so some filing and grinding with my dremel tool was in order. I also had to open up the 1/2″ washers to 5/8″ using a step bit. When it’s all put together it looks like this:
While you can’t see them in the picture, the 1/2″ washers are situated inside the coupling on the right side, to help center the bolt.
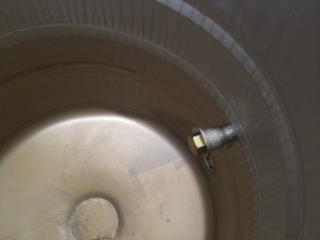
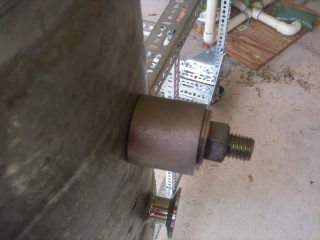
Time to swage the opening. I placed the swaging tool in the 13/16″ hole like so:
| Inside View | Outside View |
Now, using either 15/16″ wrenches or sockets, slowly force the reducing coupler through the hole until the diameter just matches the outer diameter of the 1″ ferrule. If you go a little too far, the dimple diameter can be reduced by lightly tapping the dimple with a hammer. Check the fit and then prepare to solder the ferrule in place.
First, prep the area with sandpaper. make sure that all mating surfaces are clean and sanded to ensure a good solder joint. Stainless steel requires a special flux and 4% silver solder in order to provide a solid joint. I pick up a few packages from my local AirGas Store for about $10. Place the ferrule into the hole, making sure that the ferrule sits flush or just slightly below the inside surface of the keggle. Place about 3 turns of the solder in the area between the dimple and the ferrule, and apply some flux. The flux is primarily hydrochloric acid, so be very careful not to get any on you, your clothes, or anything valuable.
Now gently heat the area between the ferrule and the keggle with a standard propane torch. As the joint heats up, the flux will start to bubble, smoke and turn brown, and the solder will finally melt. Be very careful not to burn off the flux, and do not inhale the fumes (this should be done outside, or in a well-ventilated area). As soon as the solder melts, remove the heat and allow the joint to cool naturally. Once cool, wipe off any excess flux with a damp rag (wear gloves, remember, hydrochloric acid), inspect the joint and test for leaks. The inside joint should look something like this:
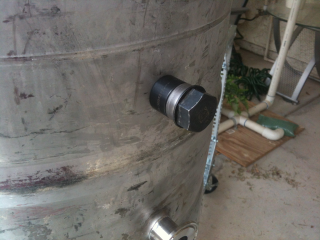
So far, I’ve put two TC ferrules on this keggle, one for a ball valve and the other for a thermowell or thermometer, and am thinking about adding a third for a sight glass:
The whole process, from keg to keggle, took a few hours and was well worth it. Just remember to take your time, have the right equipment, and be careful.

